Early Access Save Activity Hierarchy Display Settings as Views
About This Feature
-
You can use the Views feature to save your display settings (such as Filter or Group by settings) for the Activity Hierarchy in Uptempo Plan, so that you can easily apply the same settings again at any time.
-
Whenever you customize the display settings in the Timeline or Summary display modes of the Activities section, you can save these settings as a view.
-
After you have created a view, it is shown in the Views menu on the Timeline and Summary display modes. Select a previously created view from this menu to quickly apply the display settings associated with the view.
-
Any user can create views for their own use, which aren't visible to other users. Administrators can also create views that are available to all users within their organization, and manage those views as part of the Activity Configuration settings.
Note
This feature is currently available in Early Access, so it is not automatically enabled in your Uptempo instance. To use this feature, speak with your Customer Success contact about enabling it for your organization.
Using Views
Learn how to use views to save your Uptempo Plan display settings, and to quickly apply those settings again at any time.
Before You Begin
To follow the instructions in this section:
-
You must have the necessary permissions to access the Activities section of Uptempo.
-
Some steps (as indicated) additionally require administrator access to your Uptempo instance.
Create a View
After you have customized the display settings in the Timeline or Summary display modes of the Activities section, you can save your configuration as a view. When you select this view later, your saved display settings are immediately applied again. You can use views as a useful shortcut for display settings that you use frequently.
You can create as many saved views as you need. By default, views you create are exclusive to you, and aren't available to any other user in your Uptempo instance. If you are an administrator, you can additionally choose to create views that are available to all users in the instance.
To create a new view, follow these steps:
-
In Uptempo, click Activities in the sidebar to view the activity hierarchy.
-
Use the controls on the Activity Hierarchy to apply the display settings that you want to save:
-
Views will save any display settings you apply using the Filter, Group by, and Show full hierarchy controls. For detailed instructions on how to use these controls, see Filtering and Grouping Activities.
-
You can create views from either the Timeline or the Summary: the steps for creating a view are the same in both display modes.
-
-
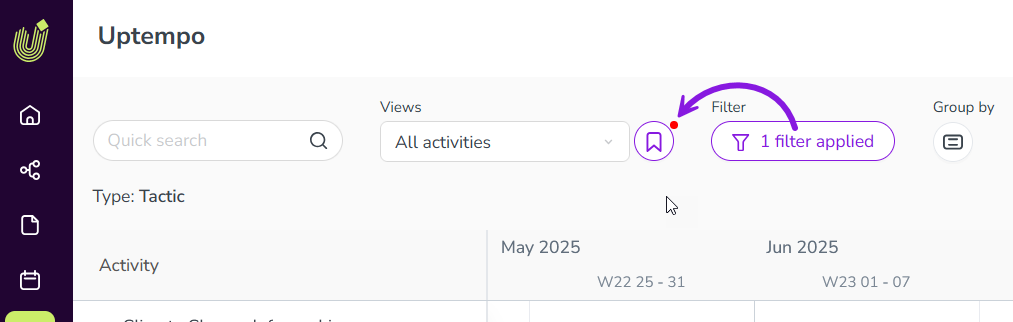
After you apply at least one display setting, a small badge is displayed on the
 View Options button to indicate that you can save the current display setting configuration as a view:
-
To save the display settings as a view, click
View Options.The View options panel is displayed.
-
Type a name for your new view into the View Name field.
-
Optional: By default, the view will be created as a personal view that is only available to you. If you are an administrator, you can set the new view to be available to all users in your Uptempo instance.
To do this, click
 My View on the View Name field, then select For my organization:
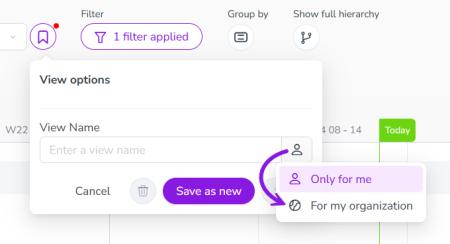
The button on the View Name field changes to
 Organization View to reflect the change in view type.
 -
To finish creating your new view, click Save as new.
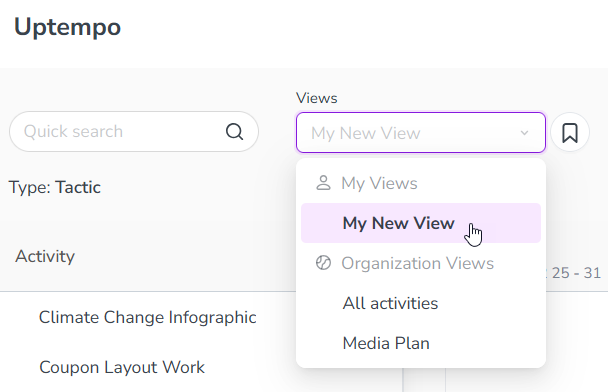
The View options panel closes, and your new view now appears in the Views menu:

Note: By default, views are displayed in the Views menu in alphabetical order.
If you are an administrator, you can customize the order in which Organization Views are displayed in the Views menu. For instructions, see Change the Display Order of Organization Views.

You have successfully saved your display settings as a view, and can now select it at any time to quickly apply the same display settings.
Tip
You can also create a new view by copying an existing view. To do so, select the view you want to copy (see Apply a View). Then, click View Options, enter a new name into the View Name field, and click Save as new.
The resulting view will have the same display settings as the view it was copied from, and you can use this as a base to make additional changes (see Edit a View).
Apply a View
After you have saved display settings as a view, you can quickly recall them by applying the view to the Timeline or Summary display modes in the Activities section.
To apply a view, follow these steps:
-
In Uptempo, click Activities in the sidebar to view the activity hierarchy.
-
You can use views in both the Timeline and Summary display modes.
-
-
Click the Views menu to see available views. Views are displayed in two sections:
-
My Views: Lists personal views that you have created yourself.
-
If you have not created any views yet, this section is hidden.
-
-
Organization Views: Lists views created by administrators for all users in your Uptempo instance.
-
This section is always visible. If no Organization Views have been created yet, it will list only the default All activities view.
-
-
-
Click on the view you want to use to apply it.
The display settings associated with the view are immediately applied to the Activity Hierarchy, and the display setting controls update to reflect the currently applied settings.
-
To remove all display settings, select the view All activities from Views > Organization Views.
You have successfully applied a view. If needed, you can now edit the view to make changes such as renaming the view, or changing its saved display settings.
Note
The system will remember the last view you applied, and will automatically apply it whenever you return to the Activities section, such as after you navigate to a different section, close your browser, or log out of Uptempo.
Edit a View
After you have created a view, you can make changes to it at any time, such as changing its name and display settings. If you're an administrator, you can also convert a My View into an Organization View (and vice-versa).
Rename a View
To rename an existing view, follow these steps:
-
In the Activities section of Uptempo, use the Views menu to select the view you want to rename.
-
You can do this in either the Timeline or Summary display modes.
-
-
Click
View Options.The View options panel opens.
-
Type the new name for the view into the View Name field.
-
To apply your changes, click Save.
Note: If you click Save as new, this will make a copy of the view under the new name, and will not change the name of the original view.
You have successfully renamed the view, and it will be displayed in the Views menu under its new name.
Change a View's Display Settings
To change the display settings associated with a view, follow these steps:
-
In the Activities section of Uptempo, use the Views menu to select the view you want to rename.
-
You can do this in either the Timeline or Summary display modes.
-
-
Use the controls on the Activity Hierarchy to adjust the display settings as needed.
The
View Options button displays a badge to indicate that the view has unsaved changes. -
Click
View Options.The View options panel opens.
-
To apply your changes to the current view, click Save.
You have successfully changed the view's display settings, and the new settings will be used whenever you apply the view from now on.
Change a View's Type (For Administrators)
If you are an administrator user, you can change a view's type from My Views to Organization Views (and vice-versa).
To change a view's type, follow these steps:
-
In the Activities section of Uptempo, use the Views menu to select the view you want to rename.
-
You can do this in either the Timeline or Summary display modes.
-
-
Click
View Options.The View options panel opens.
-
Click
My View or Organization View on the View Name field, and click on the other view type to change to it.The button on the View Name field changes to reflect the new type selected.
-
To apply your changes, click Save.
Note: If you also change the view's name and click Save as new, this will make a copy of the view under the new name and with the new type, and will not change the name or type of the original view.
Delete a View
If you no longer need a view, you can delete it at any time.
To delete a view, follow these steps:
-
In the Activities section of Uptempo, use the Views menu to select the view you want to delete.
-
You can do this in either the Timeline or Summary display modes.
-
All users can delete their own views. Only administrators can delete Organization Views, including views that were created by other administrator users.
-
-
Click
View Options.The View options panel opens.
-
Click
 Delete View.
 -
To permanently delete the view, click Delete in the confirmation dialog.
The activity hierarchy table reloads with no filters or groupings applied, and the deleted view no longer appears in the Views menu.
You have successfully deleted the view.
Managing Activity Views for Your Organization
As an administrator, you have access to additional tools for managing the Organization Views that are available to all users in your Uptempo instance.
Before You Begin
To follow the instructions in this section:
-
You must have the necessary administrator permissions to access Activity Configuration.
See a List of All Organization Views
As an administrator, you can see a list of all Organization Views that you and other administrators have created in your Uptempo instance. Using this list, you can see:
-
Metadata about each view, including the view's name, who created it, when it was last updated, etc.
-
Details about the specific filter and grouping configurations saved to the view
To see a list of all Organization Views in your Uptempo instance, follow these steps:
-
In Uptempo, click Activities in the sidebar to view the activity hierarchy.
-
Click
 Settings.
The Activity Configuration page opens.
-
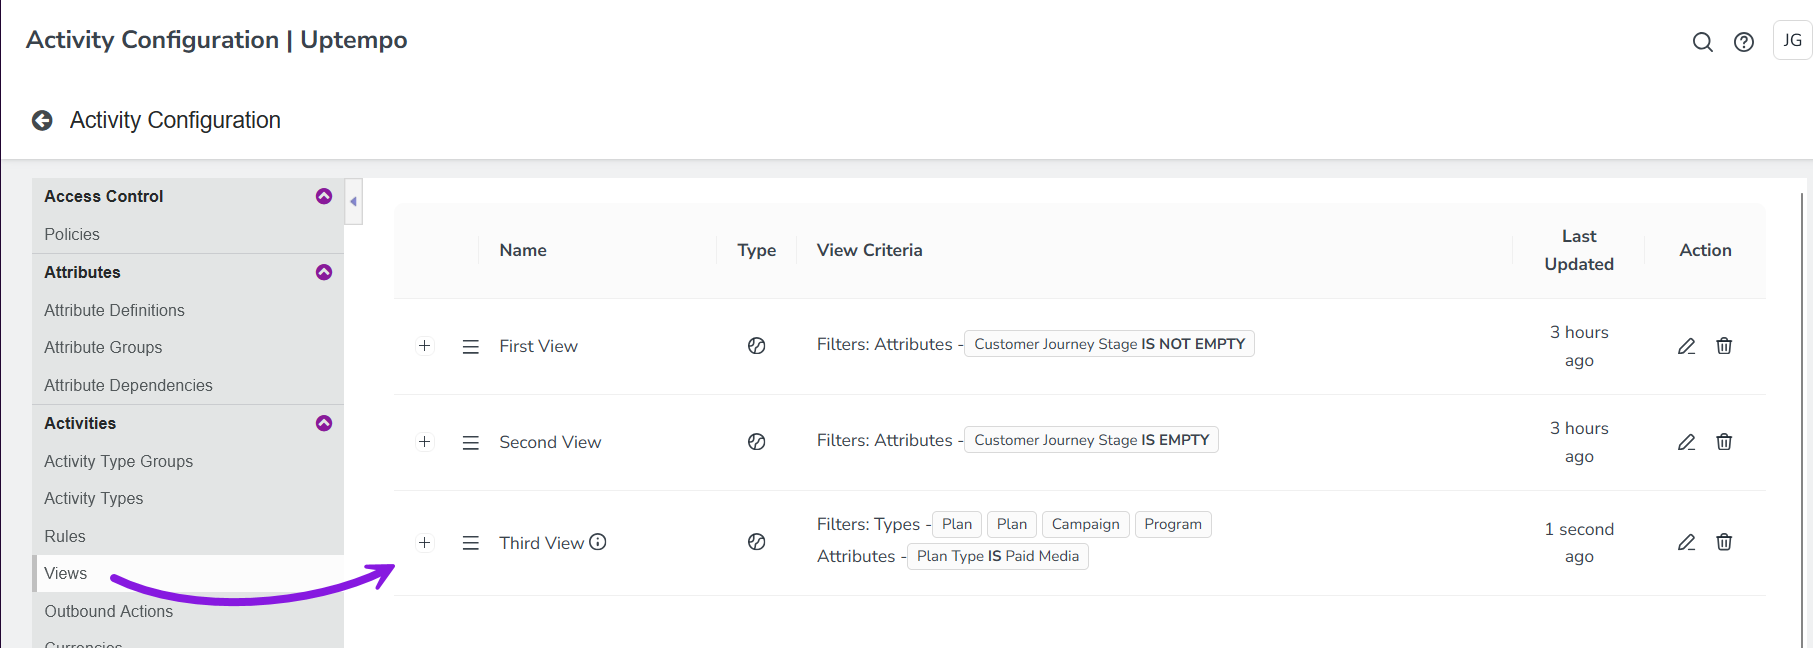
On the Activity Configuration page, click Activities > Views.
A list of all existing Organization Views is displayed:

-
The list displays each view's name (and description, if present), associated display settings, and when it was last updated. On any view, click + Expand to view more details, such as who created the view and when.
You have successfully accessed the list of all Organization Views in your Uptempo instance. From here, you can edit the name or description of any existing view, as well as change the order in which the views are displayed in the Views menu.
Change the Name or Description of an Organization View
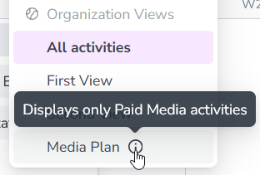
From the list of Organization Views, you can quickly rename any existing view. You can also add (or change) any view's description text. Description text is displayed as a tooltip beside the view's name in the Views menu, and is useful for explaining the intended purpose of a view:
To change the name or description of an Organization View, follow these steps:
-
In the list of Organization Views, find the view whose name or description you want to change.
-
For instructions on how to access the list, refer to See a List of All Organization Views.
-
-
On the row of the view you want to edit, click
 Edit View Name in the Action column.
The Edit Saved View dialog opens.
-
Use the Name and Description fields to enter a new name or description text (or both).
-
To apply your changes, click OK.
You have successfully changed the name or description of the view. Your changes will be reflected in the Views menu with immediate effect.
Change the Display Order of Organization Views
By default, views are displayed in the Views menu in alphabetical order. For Organization Views, you can modify the display order to list these views in any custom order of your choice.
To change the display order of Organization Views, follow these steps:
-
The list of Organization Views shows the views in the order in which they are shown in the Views menu. In the list, find a view whose position in the list you want to change.
-
For instructions on how to access the list, refer to See a List of All Organization Views.
-
-
In the Name column, click-and-drag the
 Menu Order handle by the view's name. Drop the view in the new list position where you want it to appear:
-
Repeat steps 1 and 2 until the views are in the order you want. Your changes are saved automatically.
You have successfully changed the display order of your Organization Views. Your changes will be reflected in the Vie ws menu with immediate effect.