Timelines
In the Planner, you can display the marketing activities for a year in a clear tree structure. You can now schedule various activities by specifying timelines for them. Timelines represent the time range in which the marketing activity takes place, for example, a trade fair or a discount promotion.
For a timeline, you specify a start date, an end date, and a category. Note that you can create a timeline only in the calendar view.

Timelines are displayed as bars and their color depends on the category you assign. The color of a category is defined when you set up the system and can only be changed system-wide by an administrator. Contact your administrator if you have any questions.
The timelines of sub-elements are displayed in groups of gray bars on the level of the parent element. The gray bars represent the timeline between the start date of the earliest and the end date of the last planned timeline.
For greater clarity, you can display the timeline names in the bars in the calendar. The administrator must enable this function throughout the system. If you have any questions, please contact your system administrator. If the function is enabled, the names are also displayed in a PDF export of the timelines.
When you place the cursor on a timeline, a tooltip lists key information:
In the above example, PR is the name of the element for which the timeline was created. The name of the timeline is Interview smart digitalism, and the assigned category is Press release. The timeline starts on May 21, 2020 and ends on June 16, 2020.
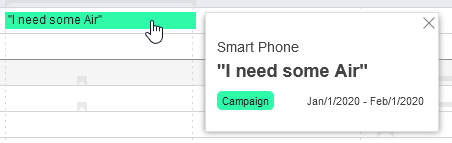
If activated in your system and set up for the timeline, more information can be displayed in the tooltip:

The example above shows visual information about a campaign. It is also possible to display data from third-party systems. For more information, see chapter Additional Information. If you have any questions, please contact your administrator.