HTML5 Audio
You need to have the content editor open. To access the editor for a planning activity, go to the activity's detailed view and click Quick Actions > Edit general element info. For a timeline, open the Timeline Context Menu and click Details. The Edit Timeline dialog box opens.
-
In the editor, position your cursor where you want to insert the audio file.
-
Click the
 icon.
icon. -
The HTML5 audio dialog box appears.
-
Click Browse....
-
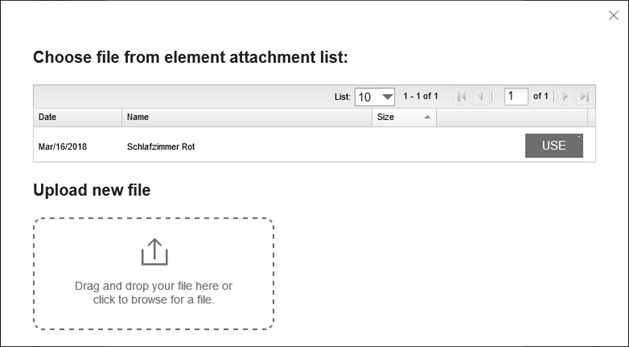
Another dialog box appears:

The top list shows the activity's attachments. Note that the files can be of different formats, including documents, vector graphics, etc.
-
If you don't see the audio file you need in the existing attachments list, upload a new file by dragging and dropping it into the lower left area.
-
The audio file is uploaded and added to the attachment list.
-
In the attachment list, click the button next to the audio file you want to include.
-
The audio is included in the preview in the HTML5 audio dialog box.
-
Edit the properties of the audio file. Refer to the following sections for detailed information.
-
Click .
The audio file has been added to the editor.
You can access the following properties in the HTML5 audio dialog box on the Audio infos tab:
|
Function |
Description |
|---|---|
|
Orientation |
Select the alignment of the audio player in the display:
|
You can access the following properties on the Advanced tab:
|
Function |
Description |
|---|---|
|
Autoplay? |
Select whether the audio file plays automatically when you open the additional information. |