Document Size
Templates can be designed to allow you to change the size of your document. For instance, you can create folding fliers in various sizes from one template.
If this is available for your document, you set the document size while creating the document. If necessary, you can change the size again afterwards.
The resizing option is available only if the template is a single-page template that cannot be enhanced with other pages.
If you can change the size of a document, the Size option is listed in the Setup area of the Document tab in the document editor. Choose  to open the Set Document Size dialog box.
The step 2 button in the customizing wizard is displayed as shown in the screen shot below:

The number and icon are displayed in dark gray and an arrow is displayed on the right side of the button.
If the size cannot be changed, the button is displayed as follows:

The number and icon are displayed in a lighter color and a lock is displayed on the right side of the button. In this case, you can continue editing the next step directly.
The designer defines how the change affects the content (text, image) and the area in which you can change the size.
Content is affected in three different ways:
-
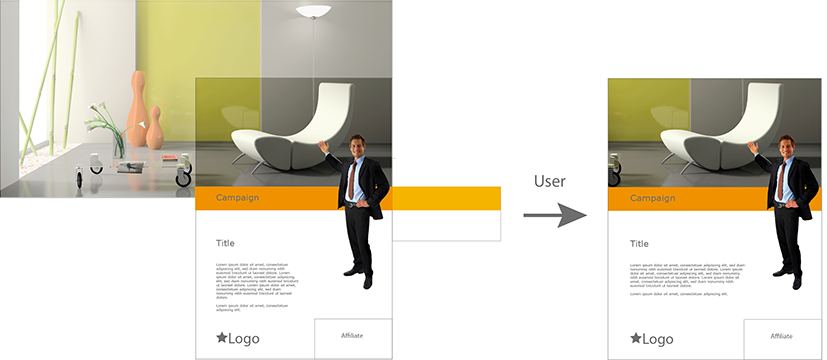
Zoom: in this case, the size change is applied to the content (that is, you scale the document and content by the same factor:
-
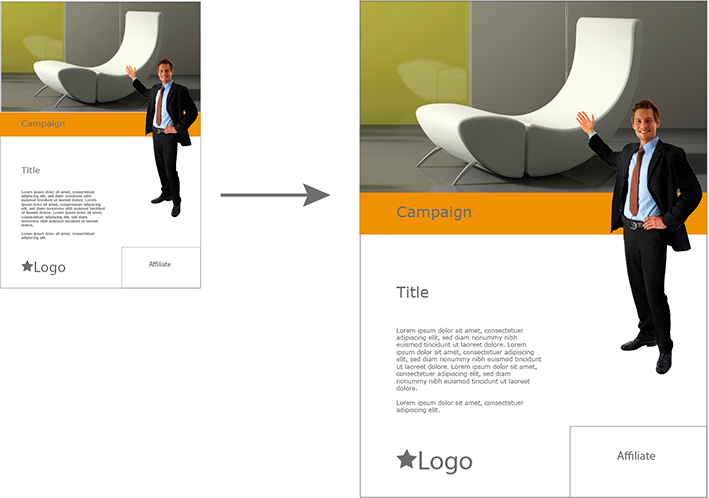
Scaling dimensions: in this case, you change the dimensions of the document but do not automatically scale the content to the same extent. However, the position, the size of text and image boxes, and the visible sections of an image can be changed:
-
Adapting height dynamically: in this case, you change the width of the document if necessary. The height adapts to fill the text variable.
There is no difference between the first two options when you change the height. You notice the difference only after refreshing the view (see Refreshing the Document Preview). The designer will specify an option here that he or she thinks provides the best results for the documents.
You can see the third option in a corresponding message in the customizing wizard on the right of the Step 2 – Document size button:

First, the designer sets a minimum and maximum width and height. This results in a scaling range. The designer also specifies whether only proportional or also non-proportional scaling is possible.
If only proportional scaling is allowed, you can change the width and height up or down to the maximum and minimum limits but only by the same factor.
Example for Proportional Scaling
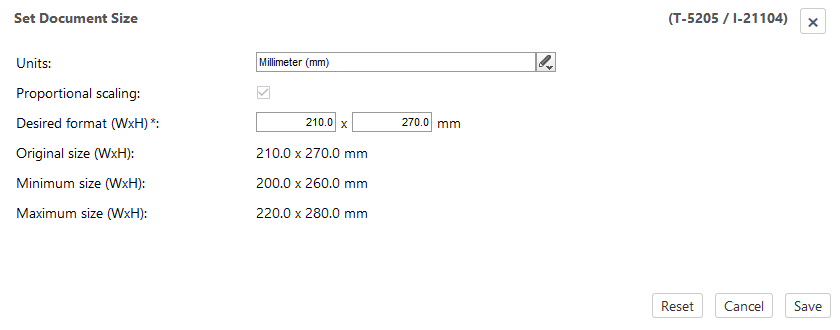
You are using a document with the original dimensions 210 x 270 mm. You want to increase the document width to 220 mm.
With proportional scaling, the height is calculated automatically:
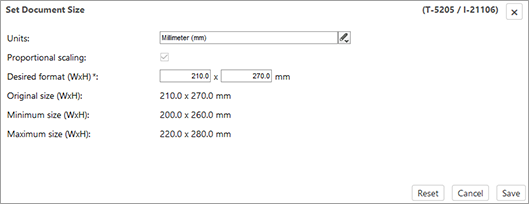
You can see whether you can only scale the document proportionally in the Set Document Size dialog box. If this is the case, the Proportional scaling checkbox is activated and grayed out, because you cannot set non-proportional scaling:
In addition, the height and width are calculated automatically if you enter the respective other value.
If non-proportional scaling is allowed, you can set the width and height up or down to the maximum and minimum limits individually. However, for example, this may lead to unsightly distortions when using the Zoom scaling option. The designer may therefore have restricted non-proportional scaling to an appropriate factor (for example, 10 % for vertical scaling).
Example for Non-Proportional Scaling
You have created a document that has a page with the dimensions 21 x 30 cm (width x height). Scaling is permitted up to a maximum of 25 x 36 cm. Scaling down is not possible, therefore the minimum width and height are 21 and 30 cm.
With these settings, you could scale the document to 21 x 36 cm. The designer has therefore specified a factor of 5% for vertical scaling. If you now leave the width unchanged, you can set a maximum height of 31.5 cm:
If you want to set a maximum height of 36 cm, you must set the following width at minimum:
If the height is 36 cm and this corresponds to the maximum non-proportional scaling of 105 %, the resulting proportional scaling is:
The corresponding width is therefore:
To set the maximum height of 36 cm, you must set a width of at least 24 cm when the maximum non-proportional scaling is 5%.
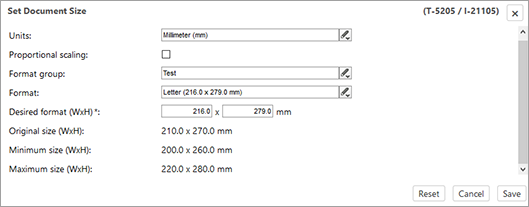
The Proportional scaling checkbox in the Set Document Size dialog box shows you whether you can scale non-proportionally: the checkbox is not activated when you first open the dialog box and you can edit it to limit scaling to non-proportional scaling.
The dialog box also assists you in correctly entering a scaling range that is restricted by a factor. If the height and width do not match, the number last entered is displayed in red. In addition, a hint on the right shows the range in which the value being edited can move:
-
On the Document tab, choose
in the Setup area. -
In the Units picklist, select the unit of measure in which you want to change the document size.
-
If available: if you want to set a document size that is proportional to the original format, activate the Proportional scaling checkbox.
-
If available: if you want to use a predefined size, select the size from the Format group and Format picklist.
-
Enter your desired format.
-
Click Save.
The Set Document Size dialog box opens.
Note: this list is displayed only if it contains specific sizes that can be used in the document. If you select a specific size, the dimensions are applied for the document.
The dialog box closes and the customizing wizard is displayed again. You have defined the document size.
Check which of the next steps is configured for your document:
-
Personalizing a document (see Customization)
-
Adding data (see Data From Data Objects)
-
Editing texts and images (see Texts and Images)