Adding a Dynamic Image Box
-
Choose the page on which you want to add the dynamic image box.
-
If the document grid is not displayed, choose > More Actions > Settings > Show Document Grid.
-
Position the cursor at the point on the page where you want the top left corner of the dynamic image box to be.
-
Click and hold the left mouse button. Hold the mouse button and drag the cursor toward where you intend the bottom right corner of your dynamic image box to be.
-
Drag the rectangle to the required size by clicking and holding the mouse.
-
Release the mouse button.
-
If Smart Groups also fit into the grid:
-
Choose Dynamic Image Box.
The Create... dialog box is displayed:

-
-
Search for an image in the Media Pool.
-
Click the plus sign on the image that you want to add.
The page is displayed with the document grid.
A red rectangle appears in the document grid:
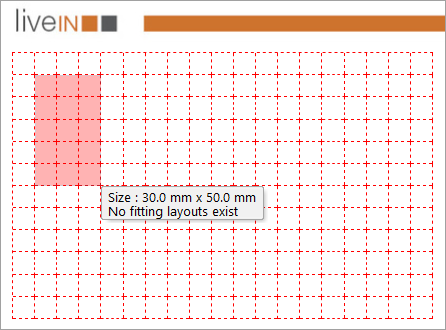
Note: note that the rectangle does not have to turn green for a dynamic image box.

The Search dialog box is displayed.
The dynamic image box is created and the selected image is added.