Annotation Tools
The review editor starts with the Annotation toolbar activated. Click View to hide all toolbars and to show the asset in a larger viewing area.

To understand which function an icon activates, hover over the icon. A tooltip indicating the function is displayed. The following table lists the corresponding shortcuts or key combinations for simplified operation for advanced users.
|
Annotation Tool |
Hotkeys |
|---|---|
|
Highlight (for text only) |
H |
|
Underline (for text only) |
U |
|
Strikethrough (for text only) |
K |
|
Sticky note |
N |
|
Free text |
T |
|
Freehand drawing |
F |
|
Freehand highlight |
None existing |
|
Squiggly line (for text only) |
g |
|
Undo |
CTRL - Z / CMD - Z |
|
Redo |
CTRL - Y / CMD - Y |

|
Shapes Tool |
Hotkeys |
|---|---|
|
Rectangle |
r |
|
Ellipse |
o |
|
Line |
l |
|
Arrow |
a |
|
Undo |
CTRL - Z / CMD - Z |
|
Redo |
CTRL - Y / CMD - Y |
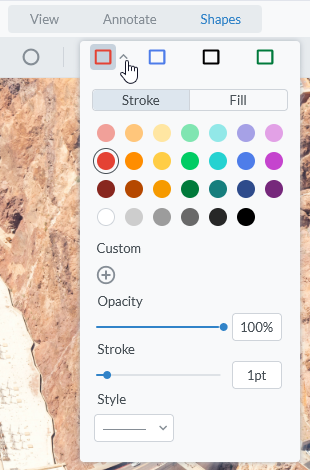
Once you have selected a tool, you can choose from one of four standard colors on the right side or you can define your own color. You can customize both the border color and the fill color individually.
-
On the right side of the toolbar with the four standard colors , open the options via the arrow symbol
 .
. -
Specify the color. Select one of the displayed colors or click the
 icon under Custom to open the color picker and select your own color.
 -
Specify the opacity.
-
Specify the stroke if displayed. This setting is not necessary for every tool and is therefore not displayed for every tool.
-
Optional: Under Stroke you can adjust the line width of the drawing tool or the edge of a shape.
A menu with the change options is displayed:
You have adjusted the color and style.
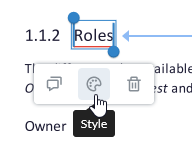
If you have selected a text with a tool or created a new shape, a quick access bar will appear below it. Click on the palette icon there to adjust the color and opacity as in steps 2 and 3:
These tools make it easier to navigate or select text, for example. To better read a page in landscape format, a tool to rotate the current document page will help you.
|
Tool |
Hotkeys |
|---|---|
|
Hand tool: panning of the image section in an enlarged document |
p |
|
Press and hold to temporarily switch to the hand tool and release to return to the previous tool |
space |
|
Rotates the full document page 90° counterclockwise |
CTRL - Shift - - / CMD - Shift - - |
|
Switch to the text selection tool |
esc |
|
Eraser to erase all shapes under the mouse cursor with the mouse button pressed |
E |
|
Stamp: inserts a local graphic at the position of the cursor |
i |
|
Advance one page |
CTRL - ↓ / CMD - ↓ |
|
Turn back one page |
CTRL - ↑ / CMD - ↑ |
|
Magnifying glass: opens Search for text in a text document review. |
CTRL - F / CMD - F |
|
Print review |
CTRL - P / CMD - P |
You may need to adjust the markers in the asset to better highlight your feedback, for example. Select an annotation/markup in the asset display and you will see this floating tool palette for your own annotations or markups:
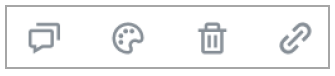
From left to right, these four icons have the following function:
-
Add comment
-
Adjust color, line width and transparency
-
Delete comment
-
Create link to another page in the review or to a URL
A rotation tool is available for lines, arrows, drawings and shapes. This is helpful if you want to highlight the object to be marked even more precisely in this way. Click in the rotation tool  and hold down the mouse button while dragging to rotate in the desired direction.
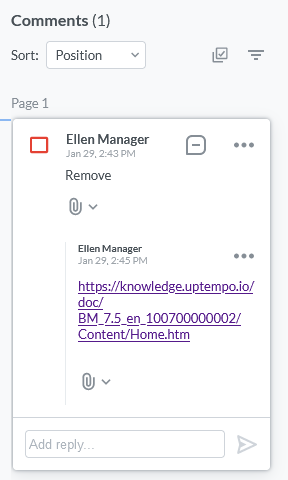
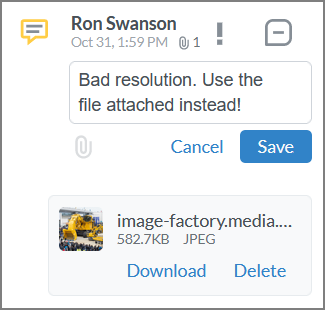
When writing a comment, you can attach files with a maximum size of 10 MB each. An attachment must first be downloaded by other participants so that it can be viewed.
With links in annotations, you can attach a file link to an annotation instead of a file attachment. Links also allow you to attach large files (> 10 MB) to an annotation.
You can use any links, such as to a collection of assets in the Media Pool or externally to a complete folder in SharePoint, OneDrive, Google or other services. Clicking on the link opens the destination in a new browser tab.